Introduction
Here we want to enable network access between the target board and the host dev. Rather than use the ethernet interface (which may not always be available on the target) we can provide power and connect via ethernet to the target board using the USB interface and the USB Gadget framework provided by Linux. This article will explain how to enable this in the Linux Kernel using Yocto and then how to configure Linux on both target and host machines.
Here is an overview of the setup
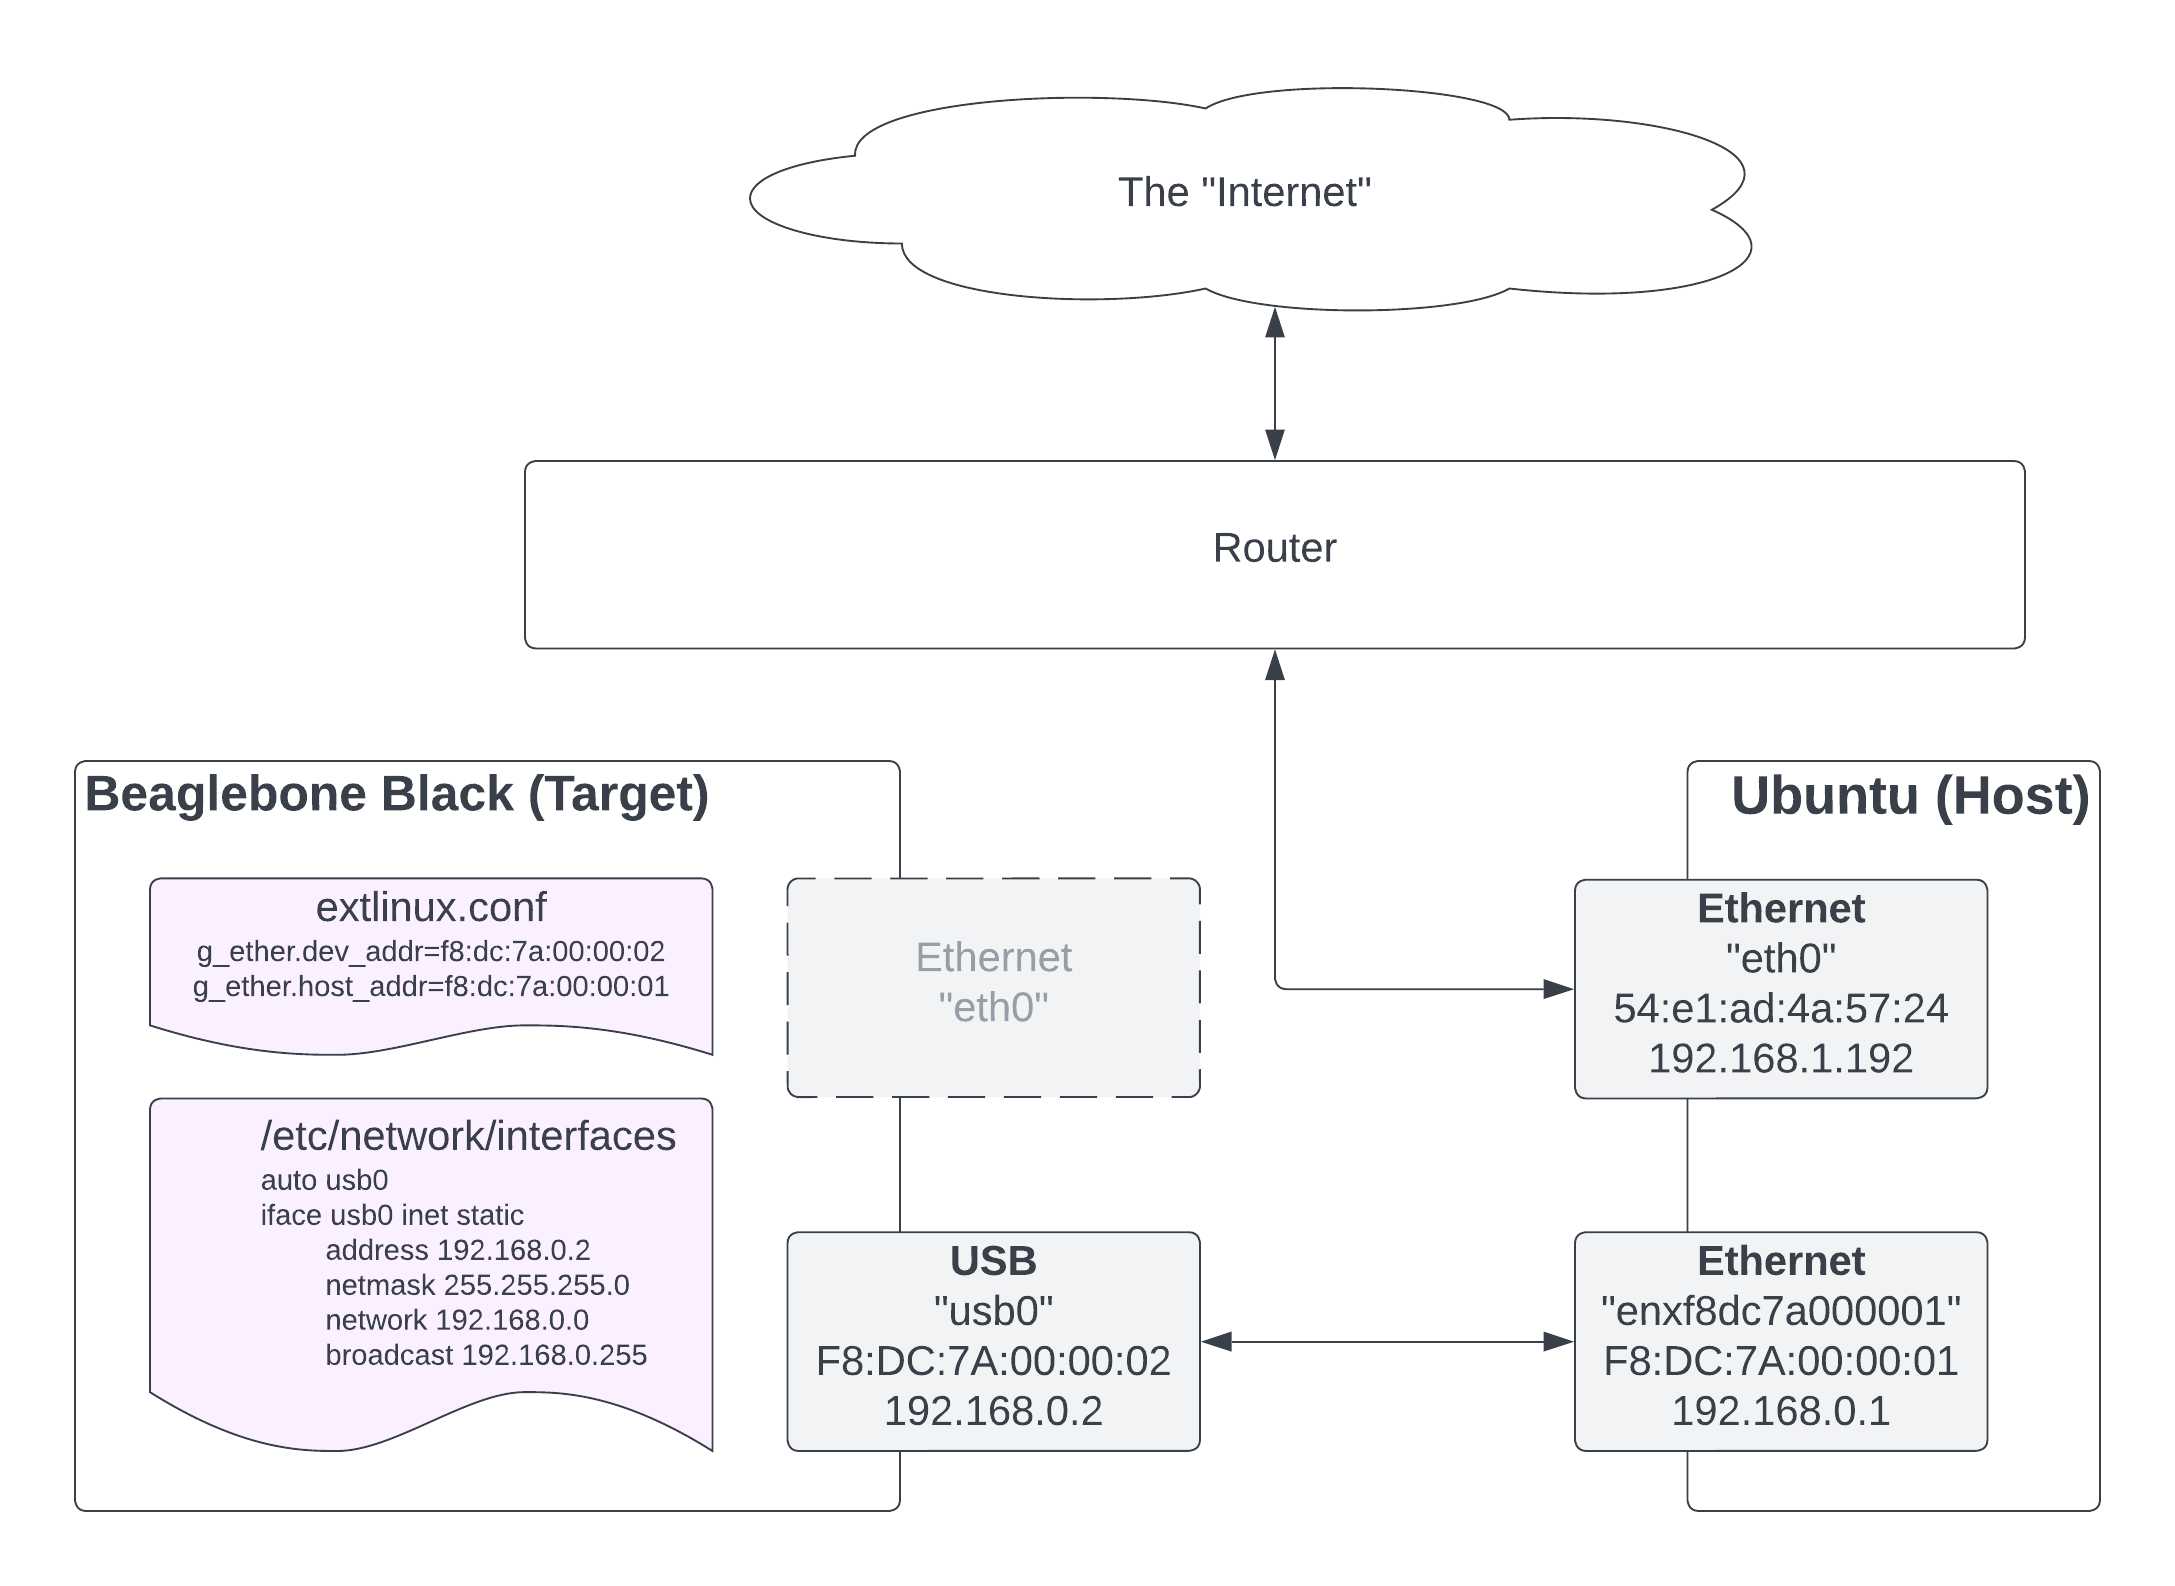
So that the PCI and USB interfaces (“eth0” and “enxf8dc7a000001”) can both work at the same time, its a good idea to use a different subnet from the existing PCI wired interface. For example, my PCI interface is set to 192.168.1.192. Therefore we set the Host USB interface to 192.168.0.1
Setting up Yocto
- Download Yocto
kirkstone4.0.2branch$ git clone https://git.yoctoproject.org/git/poky $ git checkout -b kirkstone-4.0.2 kirkstone-4.0.2 $ source poky/oe-init-build-env - Enable the
beaglebone-yoctomachine inlocal.confMACHINE ?= "beaglebone-yocto" - Enable setup hash equivalence server in
local.confBB_SIGNATURE_HANDLER = "OEEquivHash" BB_HASHSERVE = "auto" BB_HASHSERVE_UPSTREAM = "hashserv.yocto.io:8687" SSTATE_MIRRORS ?= "file://.* https://sstate.yoctoproject.org/all/PATH;downloadfilename=PATH" - Enable other build performance tweaks in
local.confBB_NUMBER_THREADS = "8" INHERIT += "rm_work"
Configuring the kernel
- Start menuconfig
$ source oe-init-build-env $ bitbake linux-yocto -c kernel_configme -f $ bitbake linux-yocto -c menuconfig - Include Ethernet Gadget by pressing “Y”
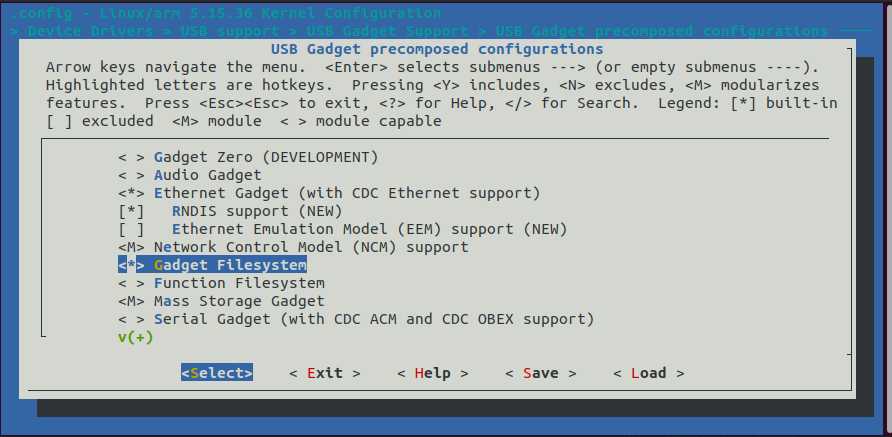
-
Save the config, exit menuconfig and build the yocto image
$ bitbake core-image-minimalYou can check the enabled options were used in the build at
build/tmp/work/qemux86-poky-linux/linux-yocto/4.12.12+gitAUTOINC+eda4d18...

...967-r0/linux-qemux86-standard-build/.config -
Insert the SDCard into the host and write the image
$ wic write tmp/deploy/images/beaglebone-yocto/core-image-full-cmdline-beaglebone-yocto-xxxxxxxxxxxxxxxxxx.rootfs.wic /dev/sdb - Open the SDCard Boot partition, and add g_ether mac addresses to the
APPENDkernel command line arguments inroot/extlinux/extlinux.confg_ether.dev_addr=f8:dc:7a:00:00:02 g_ether.host_addr=f8:dc:7a:00:00:01 - Open the SDCard Root partition and add USB0 interface settings to
/etc/network/interfacesauto usb0 iface usb0 inet static address 192.168.0.2 netmask 255.255.255.0 network 192.168.0.0 broadcast 192.168.0.255Note, without “auto usb0” the interface will not connect automatically during boot and will require manual bring up (using
ifconfig usb0 192.168.0.2 up)
Running the BBB
-
Setup the host USB ethernet interface.
$ nmcli con add type ethernet ifname enxf8dc7a000001 ip4 192.168.0.1/24 - Insert the SDCard into the BBB and power on
USB Gadget ethernet will be loaded during boot with these lines:
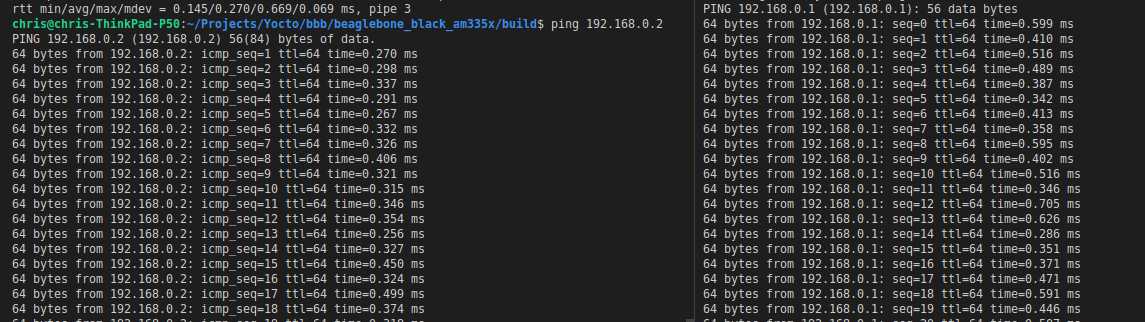
g_ether gadget: Ethernet Gadget, version: Memorial Day 2008
g_ether gadget: g_ether ready
The host USB Interface should now spring into life and connect to the target:
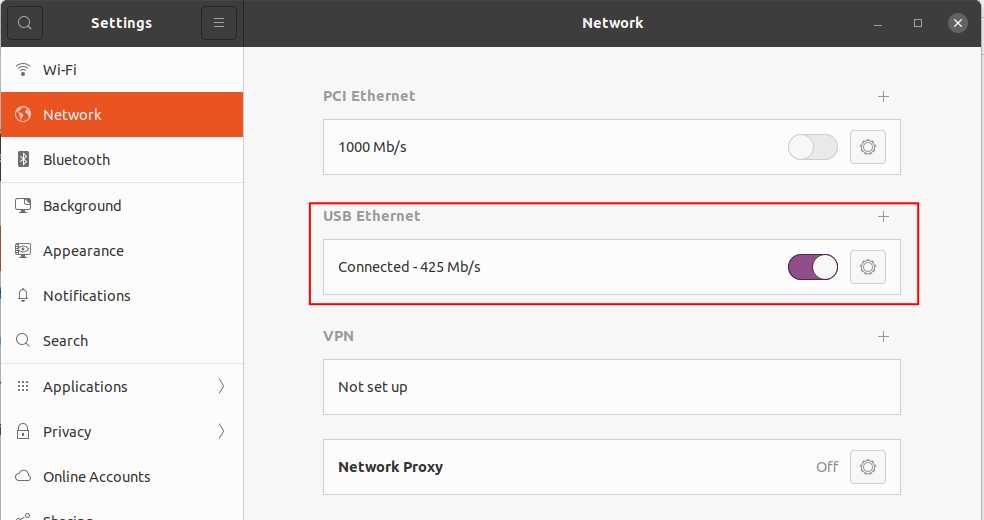
- You can now ping from either target <--> host.